
If you want to learn how to inflate a kayak the right way, you’ve come to the right place.
While you may think that inflating a kayak is as simple as pumping up a beach ball – it’s actually a little more complicated than that. Whether you’re new to kayaking, or you’ve recently made the switch from a hard shell kayak to an inflatable kayak, learning how to inflate (and deflate) your boat properly is crucial for keeping it in good condition.
Let’s take a look at how to inflate a kayak the proper way so that you can extend the life of your boat.
RELATED: 12 Best Pumps for Inflatable Kayaks in 2024
Key Takeaways
- Partially inflate the three main air chambers (floor and side walls) first, then fully inflate them and any additional accessories (such as seats, spray skirts, or skegs).
- Inflate the kayak in a dry, flat, and clear area, preferably near the launch site, and check the boat for any leaks or issues before launching.
- Be aware of the effects of temperature on the inflation level and adjust the air pressure accordingly. Carry a repair kit and a safety kit on board.
- Inflating a kayak should take no more than 10 minutes once you get the hang of it. Proper inflation can extend the life of your boat.
How to Inflate a Kayak: Step By Step
When it comes to setting up and inflating your kayak, the process is pretty much the same regardless of the type of kayak you have. Some higher quality kayaks will come with separate inflation components. But overall, all inflatable three-chamber kayaks will generally follow the same process.
Before you inflate your kayak however, you should always consult your owner’s manual first. This will allow you to make sure you’re setting up and inflating your kayak the way your specific model requires.
Step 1: Unfold and Lay the Kayak Out
The first thing you want to do is unfold and lay our kayak out. If this is your first time putting together the inflatable kayak, then pull out all the pieces and lay them out before you start inflating.
You may also like: How to store your inflatable kayak.
Step 2: Inflate the Floor Chamber
Typically, you always want to start by inflating the floor chamber first. The floor chamber is the base of your boat and if it’s not inflated properly, it will throw everything off.
When you’re inflating the floor chamber, don’t inflate it to full capacity yet. Instead, fill it up to about 60% or so. By partially inflating the floor chamber, you’re going to make way for lots of space in order for the other air chambers to settle once you move on to inflating the rest of the boat.
Step 3: Inflate the Wall Chambers
Once you have inflated the floor chamber, it’s time to move on to the side or wall chambers. In the same way that you only partially inflated the floor chamber, you’ll want to partially inflate each side-chamber as well.
Most inflatable kayaks will only come with three air chambers. If your kayak has separate chambers like a spray skirt or adjustable floor chamber, don’t worry about inflating those just yet. We’ll get to those once we have fully inflated the main three air chambers of the boat.
Step 4: Fully Inflate the Kayak
Once you have fully inflated the three separate air chambers, it’s time to make sure everything is sitting properly. Gently run your hands along the seams and surface of the side chambers and the boat’s floor. You want to just make sure that there are no indications that a warp will occur when you begin to fully inflate your boat.
If you feel like the boat is looking as it should and the three air chambers are inflating properly, you can now go back and fully inflate the boat.
When you fully inflate the three separate air chambers, you’ll want to start with the flooring first. Inflate the floor until it reaches the recommended air pressure. Check the floor to make sure it gives a nice bounce back and that it’s continuing to inflate without any issues.
Now, you can move on to the side walls and fully inflate those to the recommended PSI level.
Step 5: Inflate Seats and Other Accessories
Once you have the core structure of the boat fully inflated, it’s time to move on to any additional accessories. Some boats may come with front and rear spray skirts that also require inflation.
Other common accessories that you may need to inflate include the seat, a footrest, or a separate floor insert.
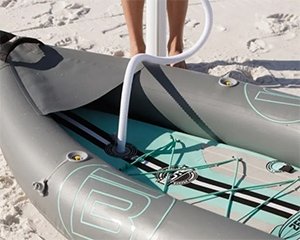
Step 6: Insert the Skeg
If your boat comes with a removable skeg, now is the time to insert it. Some boats will come with two side fins that are permanently installed on the base. If it’s cumbersome for you to transport your kayak to the water with the skeg installed, you can also wait to insert it.
If you know you’re going to be kayaking in conditions where a skeg isn’t needed, you can skip this part all together. It’s helpful to store the skeg onboard, however, just in case you do end up needing it.
Step 7: Inspect Your Inflatable Kayak
Before you launch your kayak into the water, you always want to make sure you do a full inspection of it first. Check your inflatable kayak to make sure that there are no punctures, or issues with the chambers.
Give the inflation valves a second glance as well to make sure that they are properly closed and that no air leaks out.
Where to Lay Out Your Kayak for Inflation
Before you start inflating your kayak, consider where you want to inflate it first. Some people like to inflate their kayak at home and then transport it to their destination. Others might prefer inflating their kayak once they get to their launch destination.
Whichever you choose, you want to inflate your kayak in an area where it is dry, free of any sharp rocks or sticks, and flat. This will allow you to check if there is any warping with your kayak’s construction.
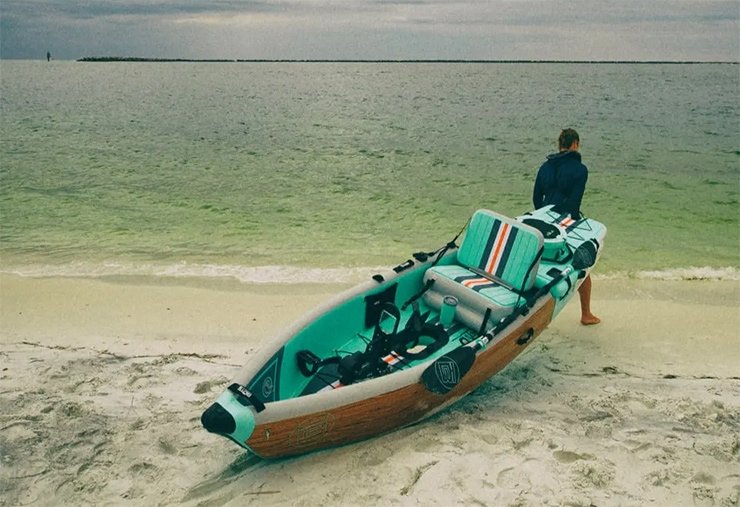
Oftentimes, some of the best places to inflate your kayak is on a flat grassy field near your launch site. A sandy beach clear of any rocks or sharp shells can also be an ideal place. However, a flat boat launch or docking area can also be a good place to inflate your kayak.
If you’re going to be using an electric pump to inflate your kayak, then you may need to inflate your kayak near your car, as most electric pump units require power from your vehicle. If your air pump is battery powered, then you likely need to store it away in your vehicle anyways after you’re done using it.
What’s the Best Pump for an Inflatable Kayak?
Speaking of pumps, if you own an inflatable kayak, then you may have considered what are the best pumps to use with your specific boat.
When it comes to all things inflatables, there are three types of air pumps that you’re going to come across. They include hand pumps, foot pumps, and electrical pumps.
Hand Pumps
Hand pumps are the more preferred manual type of air pumps. Holding on to a handlebar style lever on the top, you’re going to push down into a tube that will then inflate your kayak through the line that connects to the air valve.
Hand pumps are easy to use and require manual force. They come in all sizes and styles, including small enough to fit in your kayak’s storage compartment – in case you need it for an emergency while you’re out on the water.
Foot Pumps
Foot pumps are exactly as the name suggests. With a foot pump, you apply pressure using your foot that will then send air into your boat through the connection valve. These generally require just a bit less manual work than a hand pump.
Electric Air Pumps
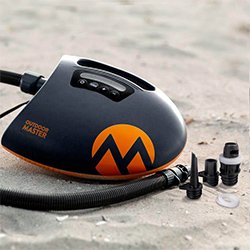
Electric pumps are perhaps the most popular option when it comes to inflating anything, especially inflatable kayaks. These pumps use an electric motor that draws in the air and inflates the kayak.
Electric pumps are super convenient because unlike a hand pump or foot pump, they can significantly cut down on the inflation time.
The downside, however, is that electric pumps can be a little tedious to use. Many electrical pumps require a car battery in order to be powered. Some electrical air pumps are battery-operated, so this means that you’ll need to keep an eye out for when it’s time to change the batteries.
When it comes to deciding what type of pump works for your inflatable kayak, it really depends on your comfort level. Some people prefer staying away from electric pumps because it can be easy to over inflate your boat with them.
On the other hand, foot pumps and hand pumps do take quite a bit of effort, are slower to inflate, and they can be a bit cumbersome.
If you’re an avid kayaker, it might be worth your while to invest in a good quality electric air pump down the line. The good news is that with most inflatable kayak purchases, your kayak will come with either a foot pump or a hand pump to get your kayak inflated.
What Is the Recommended Air Pressure for Inflatable Kayaks?
The next most commonly asked question with inflatable kayaks is “how much air should I put in my kayak?”
Whenever you purchase an inflatable kayak, the instruction manual will tell you exactly how much air pressure or PSI should be used. Every boat is different, and the construction of your inflatable kayak vastly changes the required PSI.
For example, basic PVC constructed boats can require anywhere from 2.5 to 4 PSI. On the other hand, more advanced constructions like a drop stitch kayak can require anywhere from 6 to 14 PSI.
Inflation Level for Each Air Chamber
When you’re inflating your kayak, be sure to check the required inflation levels of the floor chamber and the side chambers.
Some inflatable kayaks require a higher PSI on the floor chamber and a lower PSI on the side of chambers. This is especially the case if you have an inflatable kayak with drop stitch construction on the flooring, but traditional inflation on the sidewalls.
Also read: How to get in an inflatable kayak.
How Long Does It Take To Inflate a Kayak?
Whether you have a one person kayak or a larger tandem kayak, inflating it won’t take long at all. If it’s your first time inflating your boat, it can take you about 15 minutes or so.
After you’ve gotten the hang of inflating your kayak, it should take you no more than about 10 minutes to get your kayak all set up. Of course, using an electric pump will speed up the process significantly.
You may also like: What size kayak do I need?
Final Kayak Inflation and Assembly Checks and Tips
After you’ve inflated your boat, don’t launch it into the water just yet. Here are some assembly checks and tips to consider before you head out on your adventure.
- Always give your boat a once over before you launch. Make sure that all the valves are properly sealed. Also run your fingers over the boat and between the seams to make sure you don’t have any pinhole air leaks.
- Know the temperature for the day. If you’re expecting it to be a rather hot day out, don’t inflate your boat to absolute capacity. Hot air expands and the hot air in your kayak can make the inflation a bit higher than you have intended. This is especially the case if you’re going to be out all day.
- Make sure you have a repair kit on board with you. Ensure that your repair kit has a hand held pump and a temporary patch repair kit.
- Don’t forget your safety kit either. Standard safety kits should include bandages, an extra personal flotation device, and an emergency radio if you’re going to be kayaking out in remote or far distances.
- Practice basic safety and don’t forget to have fun. Don’t forget to bring along extra snacks and extra water so that you stay hydrated throughout the day as well!
Also read: Do inflatable kayaks need to be registered?
Conclusion
Knowing how to properly inflate your kayak will allow you to have a safe adventure every time. Proper inflation procedures will also keep your kayak staying stronger for longer.
In addition to following my kayak inflation tips, it’s important that you read your boat’s instruction manual as well. Some inflatable kayaks require special care during the inflation process. Let me know if you have any questions or comments down below!